How to Install Vinyl Plank Flooring: Complete DIY Guide
- Share
- publisher
- Cathy from Hanflor
- Issue Time
- Sep 29,2026
Summary
Learn how to install vinyl plank flooring with this practical DIY guide. Cover subfloor preparation, moisture testing, acclimation, layout, expansion gaps, click-lock installation, cutting, and common mistakes to avoid.

Installing vinyl plank flooring yourself can be a manageable home improvement project, especially with click-lock floating flooring. No glue or nails are required, and the basic installation can be done with common hand tools. The key is proper preparation: check the subfloor first, plan the layout, then install the planks. Good preparation makes the installation smoother and helps the finished floor perform as intended.
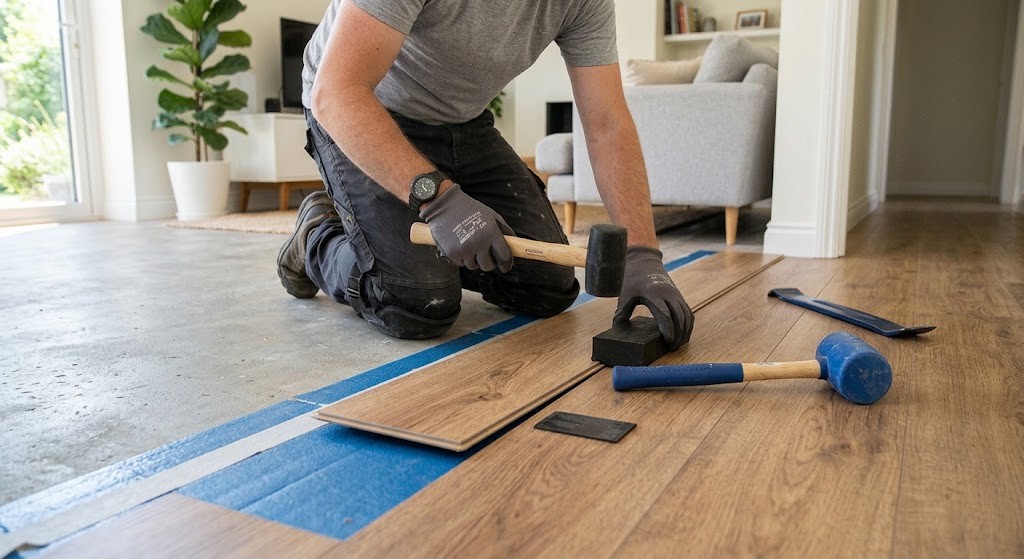
Can You Really Install Vinyl Plank Flooring Yourself?
Yes. Click-lock luxury vinyl plank (LVP) is designed to be DIY-friendly because the planks connect mechanically without adhesive. If you are comfortable measuring, making basic cuts, and following installation instructions, you can install a floating vinyl plank floor yourself.
The most important part is preparing the subfloor. Uneven areas can affect how the planks sit and may place stress on the locking joints over time. Check the subfloor for flatness, cleanliness, and moisture before installation, and correct any issues according to the flooring manufacturer's requirements.
| What you are weighing | DIY click-lock install | Professional install |
|---|---|---|
| Typical cost | Materials and basic tools | Materials plus labor |
| Tools needed | Utility knife, tapping block, pull bar, spacers, measuring tools | Usually provided by the installer |
| Difficulty | Moderate for a prepared subfloor | Handled by an experienced installer |
| Best suited for | Simple rooms with a suitable subfloor | Complex layouts, stairs, leveling work, or larger projects |
DIY installation may be less suitable for projects involving significant subfloor correction, stairs, complicated layouts, or extensive transitions. In these situations, professional installation can help address site-specific challenges.
Tools and Materials You Need Before You Start
Most click-lock vinyl plank installations can be completed with basic tools. The exact tools may vary depending on the product and installation method.
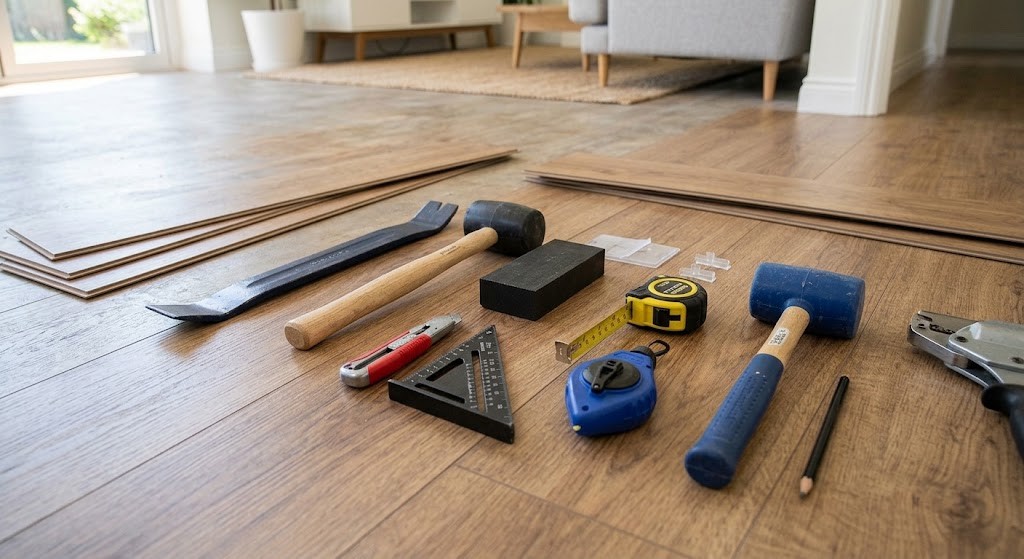
| Item | Purpose | Essential? |
|---|---|---|
| Utility knife with fresh blades | Cutting planks | Yes |
| Tapping block | Protecting and closing joints | Yes |
| Pull bar | Tightening end joints | Yes |
| Spacers | Maintaining expansion gaps | Yes |
| Rubber mallet | Adjusting stubborn joints when permitted | Yes |
| Measuring tape and T-square | Measuring and straight cuts | Yes |
| Straight edge | Checking subfloor flatness | Yes |
| Moisture meter or test method specified by the manufacturer | Checking subfloor moisture | Strongly recommended |
| Jigsaw or miter saw | Complex cuts and notches | Optional |
| Knee pads | Installation comfort | Optional |
Before ordering, allow some extra material for cutting waste. Around 5–10% extra is a common planning range, with the exact amount depending on the room shape, layout, and installation pattern. Keeping extra planks from the same production lot can also be useful for future repairs.
Subfloor Preparation: Start With a Proper Base
Before installing vinyl plank flooring, make sure the subfloor is clean, flat, dry, and structurally sound. Proper preparation helps the planks sit correctly and reduces stress on the locking joints.
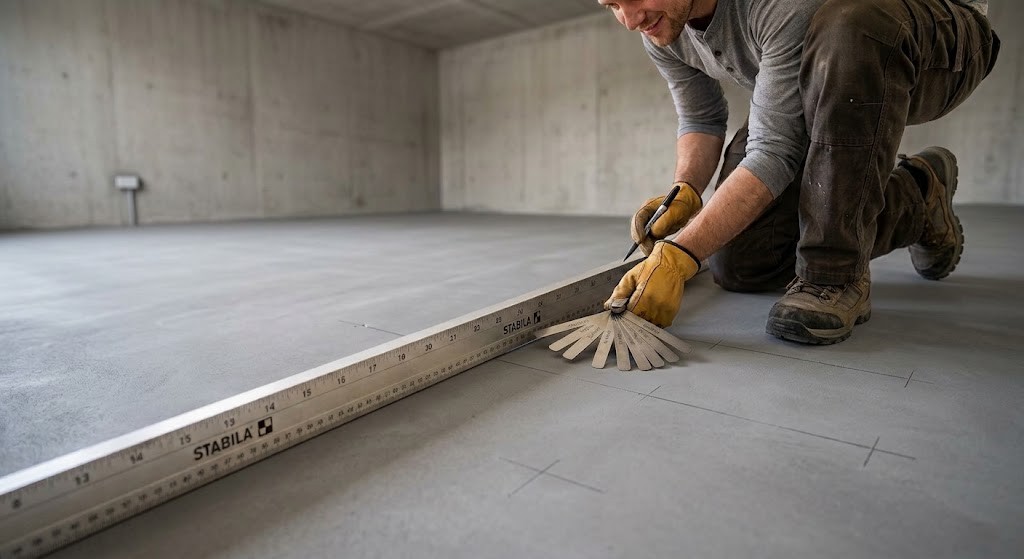
Flatness
Check the subfloor with a long straight edge and identify any high or low areas before installation.
- High spots: Sand, grind, or otherwise remove them as appropriate for the subfloor.
- Low spots: Repair with a suitable patching or leveling compound and allow it to cure fully.
- Soft or damaged areas: Repair or replace compromised subfloor sections before installation.
Always follow the flooring manufacturer's specified flatness tolerance rather than assuming one tolerance applies to every product.
Cleanliness
Remove dust, debris, loose fasteners, old adhesive, and other surface irregularities. Even small debris trapped beneath a plank can affect the finished surface and the locking system.
Moisture
Moisture is particularly important when installing over concrete. Test the subfloor using the method specified by the flooring manufacturer and make sure the moisture level is within the product's installation requirements.
- Dry-fit the first two rows before locking them together. Check the width of the final row and adjust the starting position if it would leave an unnecessarily narrow strip.
- Plan the stagger. Offset end joints between adjacent rows according to the manufacturer’s installation instructions. Avoid repeating patterns, stair-step layouts, or H-patterns where joints line up across multiple rows.
| Test | Standard | Target reading |
|---|---|---|
| In-situ relative humidity | ASTM F2170 | Typically ≤ 75% RH (some manufacturers accept up to 85% RH) |
| Moisture vapor emission | ASTM F1869 | ≤ 3 lb / 1000 sq ft / 24 hr where required |
| Plastic sheet screening test | Basic DIY check | Can indicate visible moisture or condensation, but does not replace a professional moisture test |
For concrete subfloors, check moisture levels using the method and limits specified by the flooring manufacturer. If moisture exceeds the requirements, address the source before installation. Vapor barriers, underlayments, curing time, and moisture mitigation requirements vary by product and installation method, so always follow the flooring and adhesive manufacturers’ instructions.
Acclimation: Check the Product Requirements
Acclimation allows vinyl planks to adjust to the installation environment before installation. Requirements vary by product, so always follow the manufacturer’s instructions.
- How: Bring unopened cartons into the installation area and keep them flat and properly supported.
- Conditions: Maintain the temperature and humidity specified by the manufacturer.
- Timing: Follow the recommended acclimation period for the specific flooring product, especially when the planks have been stored in unusually hot or cold conditions.
Planning the Layout
A well-planned layout helps create a balanced appearance and reduces unnecessary cuts.
- Check the direction: Consider the room’s longest dimension, natural light, and main sightlines when choosing plank direction.
- Plan the first and last rows: Avoid leaving an unnecessarily narrow strip along the final wall. Adjust the starting position if needed.
- Check door clearances: Account for the added floor thickness and undercut door casings where appropriate. Make sure doors can open freely after installation.
- Plan end joints: Stagger joints according to the manufacturer’s requirements and avoid repeating patterns or aligned joints.
Step-by-Step: Installing the Planks
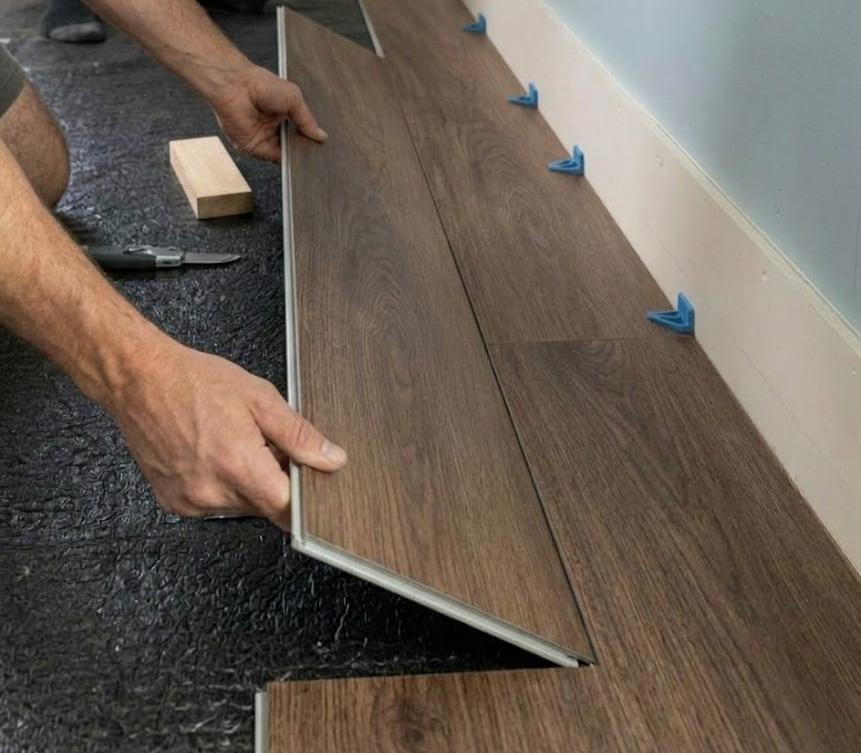
Once the subfloor and layout are ready, follow the flooring manufacturer's installation instructions and work row by row.
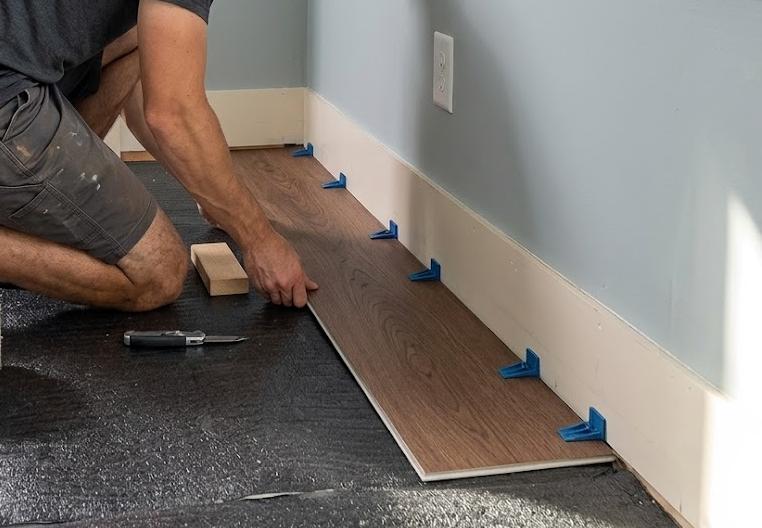
| Step | Action | Detail to get right |
|---|---|---|
| 1 | Set the first row | Maintain the required expansion gap along the wall. |
| 2 | Connect the planks | Engage the end joints according to the locking system. |
| 3 | Start the next row | Stagger end joints according to the manufacturer's requirements. |
| 4 | Lock the long edge | Engage the locking profile correctly without forcing the joint. |
| 5 | Complete the row | Use a pull bar where required to close the final joint. |
| 6 | Install the final row | Measure, cut, and position the planks with the required wall clearance. |
| 7 | Finish the perimeter | Remove spacers and install baseboards, trim, and transitions as needed. |
Never force a locking joint. If a plank does not engage properly, check its alignment and remove any debris from the groove before trying again.
How to Cut Vinyl Planks Cleanly
Many rigid-core vinyl planks can be cut using the score-and-snap method. Mark the cutting line, score it with a sharp utility knife, then snap the plank along the cut.
For door casings, pipes, and other complex cuts, a jigsaw or suitable power saw may be used. Measure carefully and test-fit each piece before making the final cut. For notches or openings, make relief cuts as needed and follow the manufacturer's recommendations for securing cut pieces.
Click-Lock, Glue-Down or Peel & Stick: Which Method to Use
Vinyl flooring is available with different installation methods, and each is suited to different applications.
| Method | How it works | Typical Applications | Watch out for |
|---|---|---|---|
| Click | Planks lock together and float over the subfloor | Residential rooms, DIY projects | Requires a properly prepared subfloor and expansion gaps |
| Glue-down | Planks are bonded to the subfloor with adhesive | Large areas, commercial applications | Requires suitable subfloor preparation and adhesive |
| Peel & stick / self-adhesive | Pre-applied adhesive bonds the flooring to the subfloor | Selected residential and renovation projects | Requires a clean, smooth, properly prepared surface |
| Loose lay | Flooring stays in place through its weight and friction | Selected residential and commercial applications | Requires a suitable, well-prepared subfloor |
Choose the installation method based on the flooring product, site conditions, subfloor, and manufacturer's requirements. For more information, see our guides on wear layer thickness and LVT vs. SPC flooring.
Expansion Gaps and Transitions
A floating floor is a single large sheet of material that expands and contracts as a unit. If any edge is pinned, the movement has nowhere to go except upward — which is exactly what buckling looks like.
- 1/4 inch minimum at every wall. Some manufacturers specify up to 3/8 inch. This gap is hidden by baseboard or quarter round; it does not need to be visible, but it must exist.
- Every fixed object counts. Door frames, kitchen islands, cabinet runs, radiator pipes and columns all need the same gap, meaning plank edges must be cut around them rather than butted tight.
- Rooms wider than 30 feet need an intermediate expansion joint — normally a T-molding — to break the floor into independent panels.
- Doorways get a transition strip sized to the height difference between floors, which also protects the plank ends from edge chipping.
- Temperature is a design input. A floor installed at 85 °F in an unheated space will shrink; one installed at 45 °F will grow. Install within the 60–80 °F window and the movement stays predictable.
Common Installation Mistakes and How to Avoid Them
| Common Mistake | Potential Problem | Prevention |
|---|---|---|
| No expansion gap | Buckling or peaking | Maintain the required perimeter gap |
| Skipping acclimation when required | Gaps or movement after installation | Follow the product's acclimation instructions |
| Uneven subfloor | Stress on joints or uneven appearance | Check and correct the subfloor before installation |
| Insufficient stagger | Repeating or weak-looking joint pattern | Follow the manufacturer's stagger requirements |
| Partially engaged joints | Visible gaps or joint separation | Check alignment and make sure each joint is fully engaged |
| Incorrect underlayment | Excessive movement or installation issues | Use only underlayment approved for the product |
| Adhesive under a floating floor | Restricted movement or buckling | Do not use adhesive unless specified |
| Installing over excessive moisture | Installation failure or floor damage | Test and address moisture before installation |
| Choosing an unsuitable wear layer | Faster visible surface wear | Select wear layer based on traffic and application |
| Poor layout planning | Excessive cuts and waste | Plan the starting point and plank direction first |
How Long Does Vinyl Plank Installation Take?
Installation time depends on room size, layout, subfloor condition, installation method, and installer experience. As a general planning guide, an experienced DIY installer can typically install around 200–300 sq. ft. (19–28 m²) per day in a straightforward room with a well-prepared subfloor. Professional installers may complete 300–500 sq. ft. (28–46 m²) per day under similar conditions.
Complex layouts, subfloor repairs, flooring removal, stairs, and multiple transitions can significantly reduce the daily installation rate. When planning a project, allow additional time for subfloor preparation, layout, cutting, and cleanup rather than estimating based only on the speed of connecting the planks.
After Installation: Care and Warranty Protection
Proper maintenance helps preserve the floor's appearance and supports warranty requirements.
Cleaning: Remove loose dirt regularly and use a cleaner recommended for vinyl flooring.
Protection: Use suitable felt pads under furniture and entrance mats to reduce tracked-in grit.
Spills: Clean spills promptly and avoid allowing water to remain on the floor for extended periods.
Warranty: Keep the product information, installation date, and relevant installation or moisture-testing records. Always review the specific warranty and maintenance requirements for your flooring collection.
When to Call a Professional
DIY installation can work well for straightforward rooms with a sound, properly prepared subfloor. Consider professional installation when:
- The subfloor needs significant leveling or structural repair.
- The room has complex layouts, multiple doorways, stairs, or specialty patterns such as herringbone.
- Glue-down flooring requires professional subfloor moisture testing or moisture mitigation.
- Local building or property requirements call for documented acoustic performance.
- The flooring manufacturer's warranty requires professional installation.
Frequently Asked Questions
Can You Install Vinyl Plank Flooring Over Existing Tile?
Often, yes, if the tile is firmly bonded, clean, and sufficiently flat. Loose tiles, deep grout lines, and significant height differences should be corrected before installation. Always check the flooring manufacturer's requirements for installation over existing tile.
Do You Need Underlayment for Vinyl Plank Flooring?
It depends on the product. If the flooring has an attached pad, additional underlayment may not be required and could affect the locking system or warranty. For products without attached underlayment, use only a compatible underlayment approved by the manufacturer.
How Long Before You Can Walk on a New Vinyl Plank Floor?
Click-lock floating floors can generally be walked on after installation, while glue-down flooring may require a waiting period before foot traffic or moving heavy furniture. Follow the flooring and adhesive manufacturer's instructions.
Do You Have to Remove Baseboards to Install Vinyl Plank?
Not always. Removing and reinstalling baseboards can provide a cleaner finish and make it easier to maintain the required expansion gap. If the existing baseboard remains, suitable trim or molding can be used to cover the perimeter gap.
How Much Extra Vinyl Plank Should You Order?
A common planning allowance is around 5–10% extra material for cutting waste. Simple rectangular rooms may require less, while rooms with angles, multiple doorways, islands, or specialty patterns may require more.
Is a Floating Click Floor Suitable for a Bathroom?
Many vinyl products can be used in bathrooms, but suitability depends on the specific product and installation requirements. Areas exposed to frequent standing water require careful attention to seams, perimeter sealing, subfloor conditions, and the manufacturer's recommendations.
What Temperature Should the Room Be During Installation?
Maintain the temperature and humidity conditions specified by the flooring manufacturer during installation. Avoid installing flooring immediately after it has been stored in unusually hot or cold conditions unless the product instructions allow it.
A Floor You Can Install Once and Forget
A successful vinyl plank installation starts with a suitable product, a clean and properly prepared subfloor, correct layout, and careful installation. Following the manufacturer's requirements for expansion gaps, joints, moisture, and maintenance can help the finished floor perform as intended.
Hanflor has been manufacturing PVC and rigid-core flooring for international markets for more than two decades, supplying SPC, WPC and LVT collections with pre-attached pads designed specifically for floating installation. If you are specifying a floor for a project of any size, our team can advise on the right core, wear layer and installation method for the environment — browse the product range, talk to our team, or send an inquiry with your room details and we will match a specification to it.
New to the category overall? Start with the main PVC flooring types explained, then compare SPC against WPC before you buy. The full Hanflor flooring guide covers every stage from choosing a plank to maintaining it.